In This Article
This post may contain affiliate links, please see our privacy policy for details.
When it comes to beauty and skincare, one often overlooked area is lip care. Yet, your lips are one of the most sensitive parts of your body and require just as much care as the rest of your skin. This is where lip balms come in, these little tubes of magic not only hydrate and soothe your lips, but also provide a protective barrier against harsh environmental factors such as wind, cold, and heat. The importance and benefits of lip balms simply cannot be overstated.
In this blog post, we'll start with an overview of lip balm, including how to make your own at home and the key ingredients often found in these moisturizing sticks. We'll also share some delightful diy lip balm recipes for you to try out. These include honey lip balm for a natural, soothing option, black cherry lip balm for a touch of fruity freshness, and a few other interesting variants. To address common questions, we'll have a section dedicated to explaining the differences between lip balm, chapstick, lip gloss, and lip oil.
But the exploration doesn't stop here! This post is part of our larger series on lip care where we dive deep into the universe of lip products. In the forthcoming posts, we'll cover topics like the art of creating homemade lip masks, the benefits of using a tinted lip balm, a comprehensive guide to choosing the right tinted lip balm, and the best lip balms with SPF for sun protection.
Find your perfect product in our curated selection of store-bought lip care essentials. Explore the Benefits of Using a Tinted Lip Balm, our Guide to Choosing the Right Tinted Lip Balm, and our picks for Tinted Lip Balms, the Best Lip Balm with SPF, and the Best Lip Scrubs. Discover the transformative power of Lip Pencils and Lip Oils and find the Best Lip Plumper for that perfect pout.
We will also discuss lip pencils, DIY natural lip plumpers, and the top choices for lip plumpers in the market. Then, we'll move on to the best lip scrubs for exfoliation, and the advantages of using a lip mask for extra hydration. We’ll cover lip products in general, including lip oil gloss and lip oils, and conclude with essential tips on how to keep your lips moisturized.
Immerse yourself in our broad coverage of Lip Products. From the reparative properties of Lip Masks to the plush sheen of Lip Oil Gloss, we guide you through the essentials. Learn How to Moisturize Lips effectively to ensure a healthy, vibrant smile every day.
We can't wait to embark on this lip care journey with you, sharing knowledge, tips, and DIY recipes. Now, pucker up, and let's dive right in!
CONTENT SUMMARY
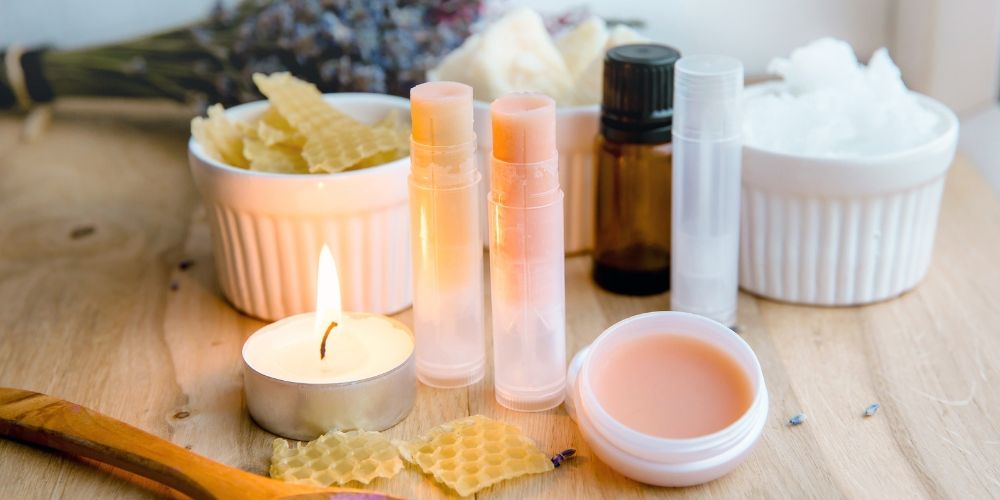
Ingredients for Homemade Lip Balm
In the world of skincare, lip balms are a staple. They protect our lips from harsh weather conditions, keep them moisturized, and can even provide a dash of color. But have you ever wondered what goes into that small tube of magic? Today, we'll be breaking down the four most common ingredients found in your lip balm: waxes, oils, butters, and essential oils or flavorings.
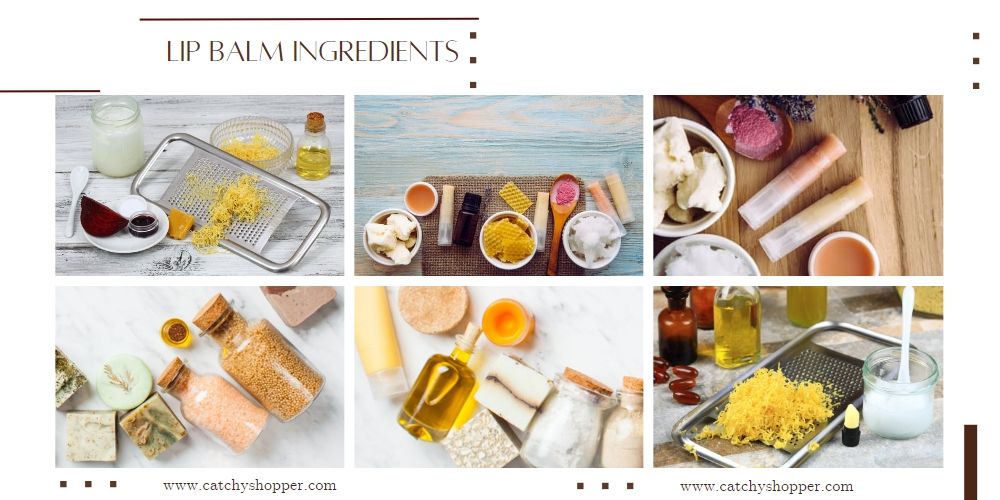
Waxes
Waxes are a crucial ingredient in lip balms, primarily responsible for giving them their solid structure. They also create a protective layer on the lips, sealing in moisture and shielding your lips from external elements.
The most commonly used wax in lip balms is beeswax. It's a natural wax produced by honey bees and is known for its moisturizing and healing properties.
If you're looking for a plant-based alternative, consider candelilla wax or carnauba wax. Both are vegan-friendly and serve as excellent substitutes, offering the same protection and consistency as beeswax.
Oils
The next key ingredient is oils. These provide the nourishing and moisturizing aspect of the balm. You can use oils such as coconut, sweet almond oil, jojoba, avocado oil, or olive oil. In lip balm, they are responsible for providing moisture and nourishment.
Coconut oil is a popular choice due to its natural hydrating properties. It also contains fatty acids, which help to reinforce the lips' natural lipid layer, enhancing their moisture retention capability.
Sweet Almond Oil is known for its emollient properties, sweet almond oil helps in conditioning the lips and making them soft. It is rich in Vitamin E, a natural antioxidant that helps protect the skin from oxidative stress and UV radiation damage.
Jojoba Oil is easily absorbed and deeply hydrating. Its anti-inflammatory properties can help soothe chapped lips, and its high concentration of Vitamins E and B helps repair and protect the lips.
Avocado Oil is a rich source of oleic acid and Vitamin E, avocado oil has excellent moisturizing properties. Its high levels of antioxidants and sterolins (natural steroids) can help heal dry, chapped lips and protect them from environmental stressors.
Olive Oil is highly moisturizing due to its richness in monounsaturated fats. It also contains Vitamin E and polyphenols, which protect the lips from the damaging effects of free radicals.
Butters
Shea butter, cocoa butter, or mango butter can be used for added moisturization and smoothness. They're also packed with vitamins and essential fatty acids that nourish the lips.
Shea butter is one of the most effective butter you can find in a lip balm. It's incredibly moisturizing and is rich in vitamins A and E, which can help to soothe and hydrate chapped lips.
Cocoa Butter is emollient-rich butter and is a great hydrator, helping to lock in moisture and protect your lips from environmental hazards due to its high fatty acid content. It's also known to improve skin elasticity, providing a natural barrier for the lips. Plus, it adds a pleasant, chocolaty aroma to your lip balm.
Mango Butter is lighter than shea and cocoa butters, mango butter is highly nourishing and softening. It's packed with vitamins A, C, and E, all of which work together to combat oxidative stress. Mango butter also has a natural ability to protect the lips from UV radiation, making it an excellent choice for lip balms. Its smooth, creamy texture and light, sweet scent add a delightful touch to your DIY lip balm.
Essential Oils and Flavorings
Essential oils and flavorings add a pleasant scent or taste to your lip balm. Plus, many essential oils come with their own skin benefits.
For example, peppermint essential oil not only gives a fresh, minty aroma but also creates a natural cooling effect, which can soothe dry and irritated lips. However, be careful not to overdo it with essential oils, as some can be irritating if used in excess.
Organic and Natural Alternatives
While many lip balms on the market use synthetic fragrances, petroleum, and other potentially harmful chemicals, there's a rising trend towards organic and natural alternatives.
As mentioned, candelilla and carnauba waxes are great plant-based substitutes for beeswax. Similarly, you can opt for lip balms using essential oils instead of synthetic fragrances. Moreover, look for lip balms that use plant oils, like jojoba oil or argan oil, rather than petroleum.
Remember, what you put on your lips can easily be ingested, so opting for natural and organic ingredients is a smart choice. Here's a list of lip balms free from harmful chemicals.
We're fortunate that many skincare brands now prioritize organic, natural ingredients that not only work wonders on our lips but also do no harm to our bodies or the environment. Here's a link to some studies explaining the benefits of these ingredients: [link to studies]
Understanding what's in your lip balm is the first step toward making informed skincare choices. We hope this breakdown helps you navigate the lip care aisle with confidence!
How to Make Lip Balm at Home
Creating your own lip balm from scratch is a fun, creative, and practical venture. By making your own lip balm, you can control what goes into your product, allowing you to avoid unwanted chemicals or allergens. Homemade lip balm can also be tailored to suit your preferences in terms of texture, scent, and color. Plus, it's cost-effective, eco-friendly, and makes for an excellent personalized gift.
Materials you'll need:
- Lip balm ingredients (as mentioned above)
- A heat-safe glass bowl or double boiler
- A scale or measuring spoons
- Lip balm tubes or small lip balm containers for storage
- A small funnel or pipette (optional, for easier transfer of the liquid balm)
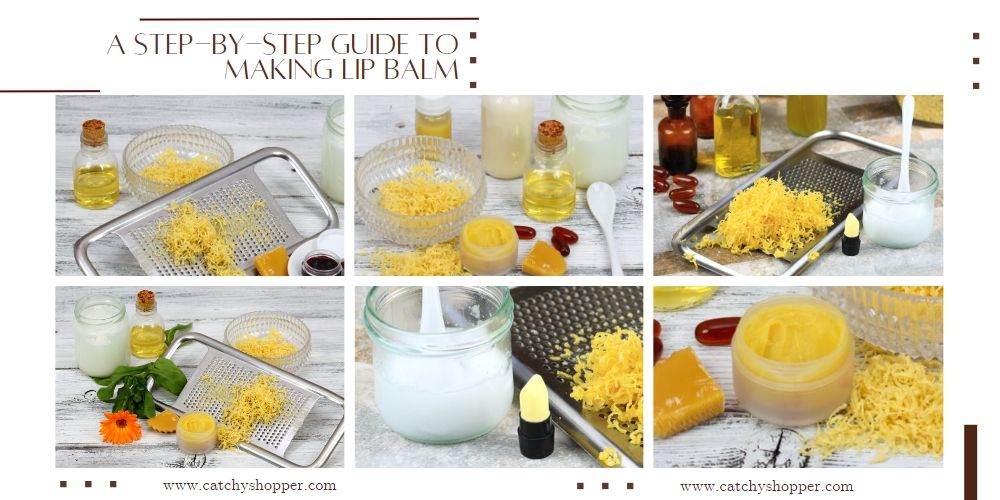
Step 1: Prepare Your Ingredients
First, prepare your ingredients. For a basic diy lip balm recipe, you can use 1 part wax, 1 part butter, and 1 part oil. For example, if you're making a small batch, you can use 1 tablespoon of each. For scent, you can add 5-10 drops of your chosen essential oil.
Step 2: Melt Your Ingredients
Place your wax, oil, and butter in your heat-safe glass bowl or double boiler. Melt your ingredients slowly over a low heat. Stir gently until all the ingredients have completely melted. Be careful not to overheat or boil the mixture.
Step 3: Add Scent and Color
Once everything is melted and mixed together, you can add your essential oil and color. Stir well to make sure everything is combined.
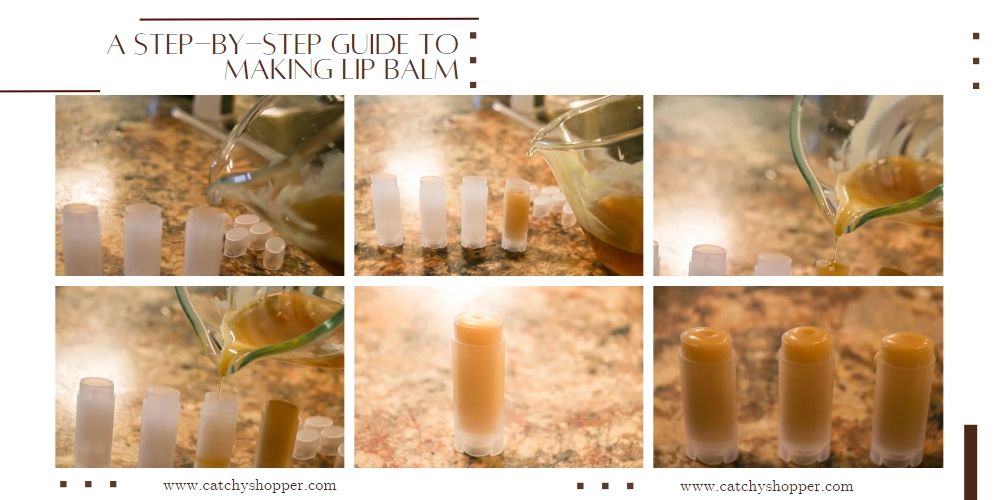
Step 4: Pour into Containers
Carefully pour the mixture into your containers. A small funnel or pipette can help with this. Fill to just below the top, as the mixture will expand slightly as it cools.
Step 5: Let It Cool
Let the lip balm cool and harden at room temperature. This can take a few hours, but don't rush it by putting it in the fridge, as this can cause it to become grainy.
Step 6: Cap and Label
Once the balm has hardened, cap your containers and label them with the flavor and date made.
💡 Safety Precautions: Remember to always perform a patch test when using a new essential oil to avoid potential allergic reactions. Also, always sterilize your tools and containers to avoid introducing bacteria into your lip balm.
Tips for the Best Lip Balm
✔️For a smoother lip balm, you can strain the mixture through a cheesecloth before pouring it into the containers.
✔️If you want a harder or softer lip balm, you can adjust the ratio of your wax and oil. More wax will make a harder lip balm, while more oil will result in a softer, glossier balm.
✔️For a nourishing and repairing lip balm, consider incorporating ingredients like Vitamin E or honey. Vitamin E is an antioxidant that helps to repair damaged skin cells, while honey is a natural humectant that locks in moisture.
✔️Want to add a touch of color to your natural lip balm? You can use food-grade colorants or a small amount of your favorite lipstick. Melt it together with your wax and oils, and you'll get a lovely tinted lip balm.
✔️To add a refreshing aroma or taste to your homemade lip balm, consider using essential oils. Citrus oils like grapefruit or orange give a fruity burst, while peppermint or spearmint offers a refreshing tingle. However, remember to use these sparingly as they can be quite potent.
✔️Always test your lip balm as you go. After melting your ingredients together, you can place a small amount of the mixture on a spoon and put it in the freezer for a minute to quickly cool it. This allows you to test the texture and adjust your recipe accordingly.
✔️Finally, remember that making lip balm is supposed to be fun! Don't be afraid to experiment and try out new ingredients or ratios. You might just create your new favorite lip balm recipe.
Homemade Lip Balm Recipes
We all love a good lip balm, but did you know that you can create your very own at home? Homemade lip balm is fun to make, customizable, and free from unwanted chemicals. Here are four amazing recipes you can try today: Honey Lip Balm, Black Cherry Lip Balm, Peppermint Lip Balm, and Cocoa Butter Lip Balm.
Honey Lip Balm
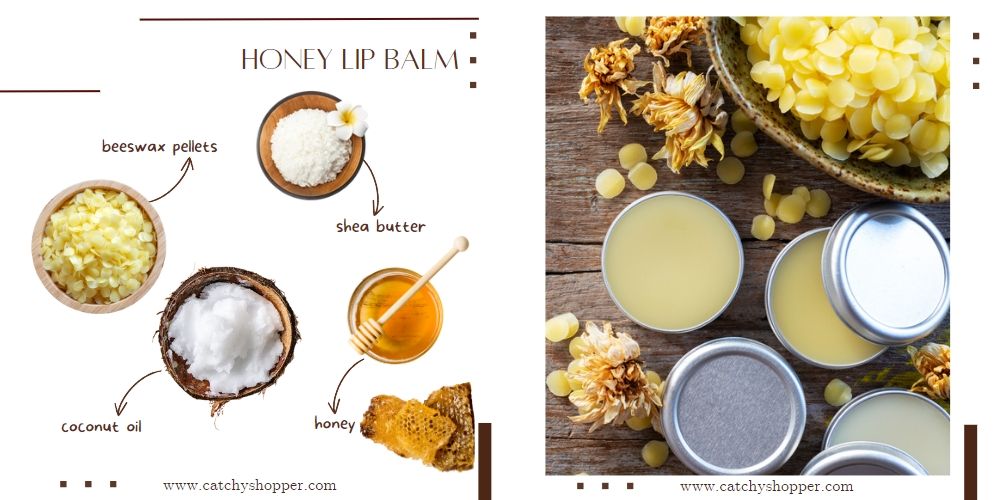
Ingredients:
- 1 tablespoon beeswax pellets
- 1 tablespoon shea butter
- 1 tablespoon coconut oil
- 1 teaspoon honey
Instructions:
- In a double boiler, melt the beeswax, shea butter, and coconut oil together.
- Once melted, stir in the honey until well combined.
- Pour the mixture into lip balm tins or pots.
- Let it cool and harden completely before use.
Benefits: Honey is a natural humectant, meaning it helps to retain moisture. It can keep your lips hydrated while offering a touch of sweetness to your lip balm.
Black Cherry Lip Balm
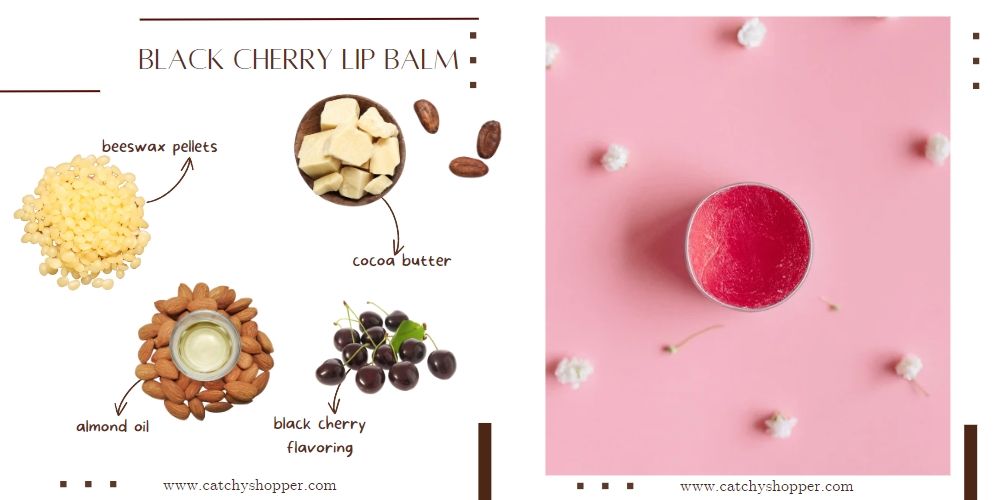
Ingredients:
- 1 tablespoon beeswax pellets
- 1 tablespoon cocoa butter
- 1 tablespoon almond oil
- 2 drops of black cherry flavoring
Instructions:
- Melt the beeswax, cocoa butter, and almond oil together in a double boiler.
- Once fully melted, add in the black cherry flavoring and mix well.
- Pour the mixture into tubes or pots.
- Allow it to cool and harden before use.
Benefits: Black cherry flavoring gives a delightful fruity aroma and taste to your lip balm.
Peppermint Lip Balm
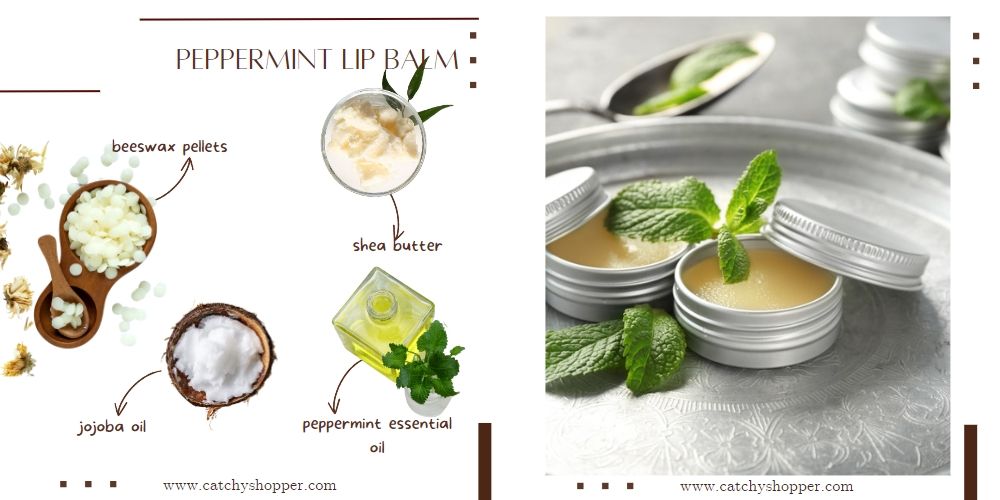
Ingredients:
- 1 tablespoon beeswax pellets
- 1 tablespoon shea butter
- 1 tablespoon jojoba oil
- 5 drops peppermint essential oil
Instructions:
- In a double boiler, melt the beeswax, shea butter, and jojoba oil.
- Once these ingredients are melted, remove from the heat and add the peppermint essential oil.
- Mix well and pour into lip balm tubes or pots.
- Let the lip balm cool and harden before use.
Benefits: Peppermint essential oil adds a refreshing, cooling sensation to your lip balm. It's also known for its soothing properties.
Cocoa Butter Lip Balm
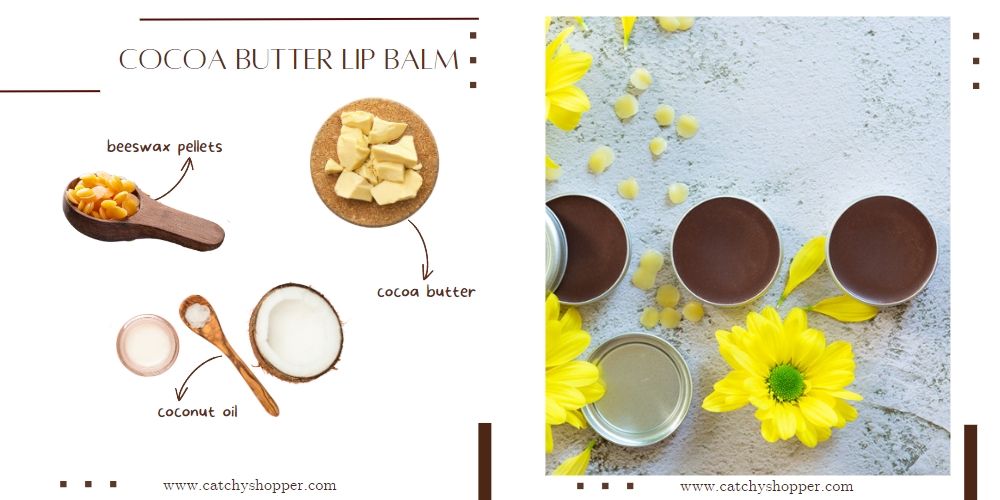
Ingredients:
- 1 tablespoon beeswax pellets
- 1 tablespoon cocoa butter
- 1 tablespoon coconut oil
Instructions:
- Melt the beeswax, cocoa butter, and coconut oil in a double boiler.
- After everything is melted and mixed, pour the mixture into tubes or pots.
- Allow it to cool and harden before use.
Benefits: Cocoa butter is incredibly nourishing and moisturizing, with a naturally sweet, chocolatey aroma.
Remember, these recipes are just starting points. Feel free to experiment with different oils, butters, and essential oils. Try adding a bit of mica powder for some color, or a bit of your favorite lipstick for a tinted balm.
Making your own lip balm is not only fun but also allows you to control what goes on your lips. Don't forget to share your experiences, your favorite recipes, or any new combinations you've tried in the comments below. Enjoy your DIY lip balm journey!
Discover the joy of creating your own lip care products at home. Learn how to prepare a nourishing Homemade Lip Mask, Homemade Lip Tint, or whip up a DIY Natural Lip Plumper for fuller, softer lips. Understand the importance of exfoliation with our tips on creating the Best Lip Scrubs at home.
DIY Lip Balm FAQ
What's the difference between chapstick and lip balm?
Lip balm is a general term for a product that is applied to the lips to moisturize and relieve chapped or dry lips. Chapstick, on the other hand, is a brand name that has become synonymous with lip balm, much like how "Kleenex" is often used to refer to tissues.
The ingredients in lip balms can vary greatly, ranging from natural components like beeswax, shea butter, and essential oils, to synthetic ingredients. Chapstick, specifically, uses a formula that includes camphor, petrolatum, and lanolin. Both lip balms and Chapstick are designed to soothe, moisturize, and protect the lips, although some argue that natural lip balms are better for long-term lip health due to the absence of potentially harmful chemicals.
What's the difference between lip balm and lip gloss?
Lip balm is designed primarily for moisturizing and protecting the lips. Lip gloss, however, is a cosmetic product aimed to give the lips a glossy, sometimes tinted, finish.
Lip balm ingredients often include waxes, oils, and butters, while lip gloss generally contains a mix of oils and waxes to achieve a high-shine finish. Some lip glosses can be moisturizing, but their primary purpose is to enhance the lips' appearance. Lip balms, on the other hand, focus on nourishing and protecting the lips.
What's the difference between lip balm and lip oil?
Lip balm is a waxy substance that coats the lips for hydration and protection. Lip oil, in contrast, has a more liquid consistency and provides a shiny finish, similar to a gloss, but with the added benefits of an oil.
Lip balms generally contain a mix of waxes, oils, and butters, while lip oils are primarily composed of one or more types of oil, like jojoba oil, almond oil, or rosehip oil. Lip oils can provide intense hydration and often give the lips a glossy finish. Lip balms, however, are better at sealing in moisture and providing a protective barrier against environmental elements.
What are the benefits of lip balm?
Lip balm serves several purposes. Its primary function is to provide an occlusive layer on the lip surface to seal in moisture and protect them from exposure to the elements. Lip balms can help prevent lips from becoming dry, cracked, and chapped. They can also contain ingredients designed to soothe, nourish, and heal the lips. Some lip balms also include SPF to protect the lips from sun damage.
What is the shelf life of homemade lip balms?
The shelf life of homemade lip balms depends on the ingredients used. As a general rule, a homemade lip balm should last for around 6 to 12 months. If your lip balm starts to smell odd, changes color or texture, or if you notice mold, it's best to throw it away. To extend the shelf life of your homemade lip balms, you can add natural preservatives like Vitamin E or rosemary antioxidant, and always make sure to use clean equipment and containers.
Final Thoughts
As we've journeyed through the world of homemade lip balms, you've learned that crafting your own lip balm recipe is a rewarding, easy, and affordable process. By choosing to make your own lip balms, you're not only gaining control over what you put on your skin but also embracing a more natural and sustainable approach to skincare.
From understanding the key ingredients used in lip balms to stepping through the process of making one from scratch to experimenting with exciting flavors like honey and black cherry, it's clear that making your own lip balm opens up a world of creativity and customization.
Let's not forget the additional benefits you gain by going DIY. You've seen how simple it is to avoid harmful chemicals and opt for natural, nourishing ingredients that serve your lips' health. Plus, the joy of using a lip balm that you've crafted yourself brings a unique satisfaction that store-bought products simply can't offer.
I encourage you all to try out these homemade lip balm recipes, or even better, create your own! Remember, the journey of making your own lip balms doesn't end here. It's a continuous process of learning, experimenting, and sharing.
I look forward to hearing about your own lip balm making experiences in the comments section below. Don't hesitate to ask any questions or share your own lip balm recipe triumphs and discoveries. After all, this blog is a community where we learn from each other's experiences.
As we wrap up this post, I'd like to acknowledge the sources that have informed and inspired this journey into homemade lip balm crafting. Their knowledge has contributed to this rewarding DIY skincare adventure, reminding us that creativity and learning are indeed a collective effort.
Now, it's over to you. Go forth, experiment, and enjoy the process of making your own lip balms!


